Learning Management - Guide for Coaches
The Learning Management System (LMS) is one of the most important components of our scholastic chess solution. Teachers who have not purchased any student licenses yet can also access the LMS functions in demo mode, to enable them to gain a better understanding of the program. (Sign up for Free and Contact us for the demo mode to your account.)
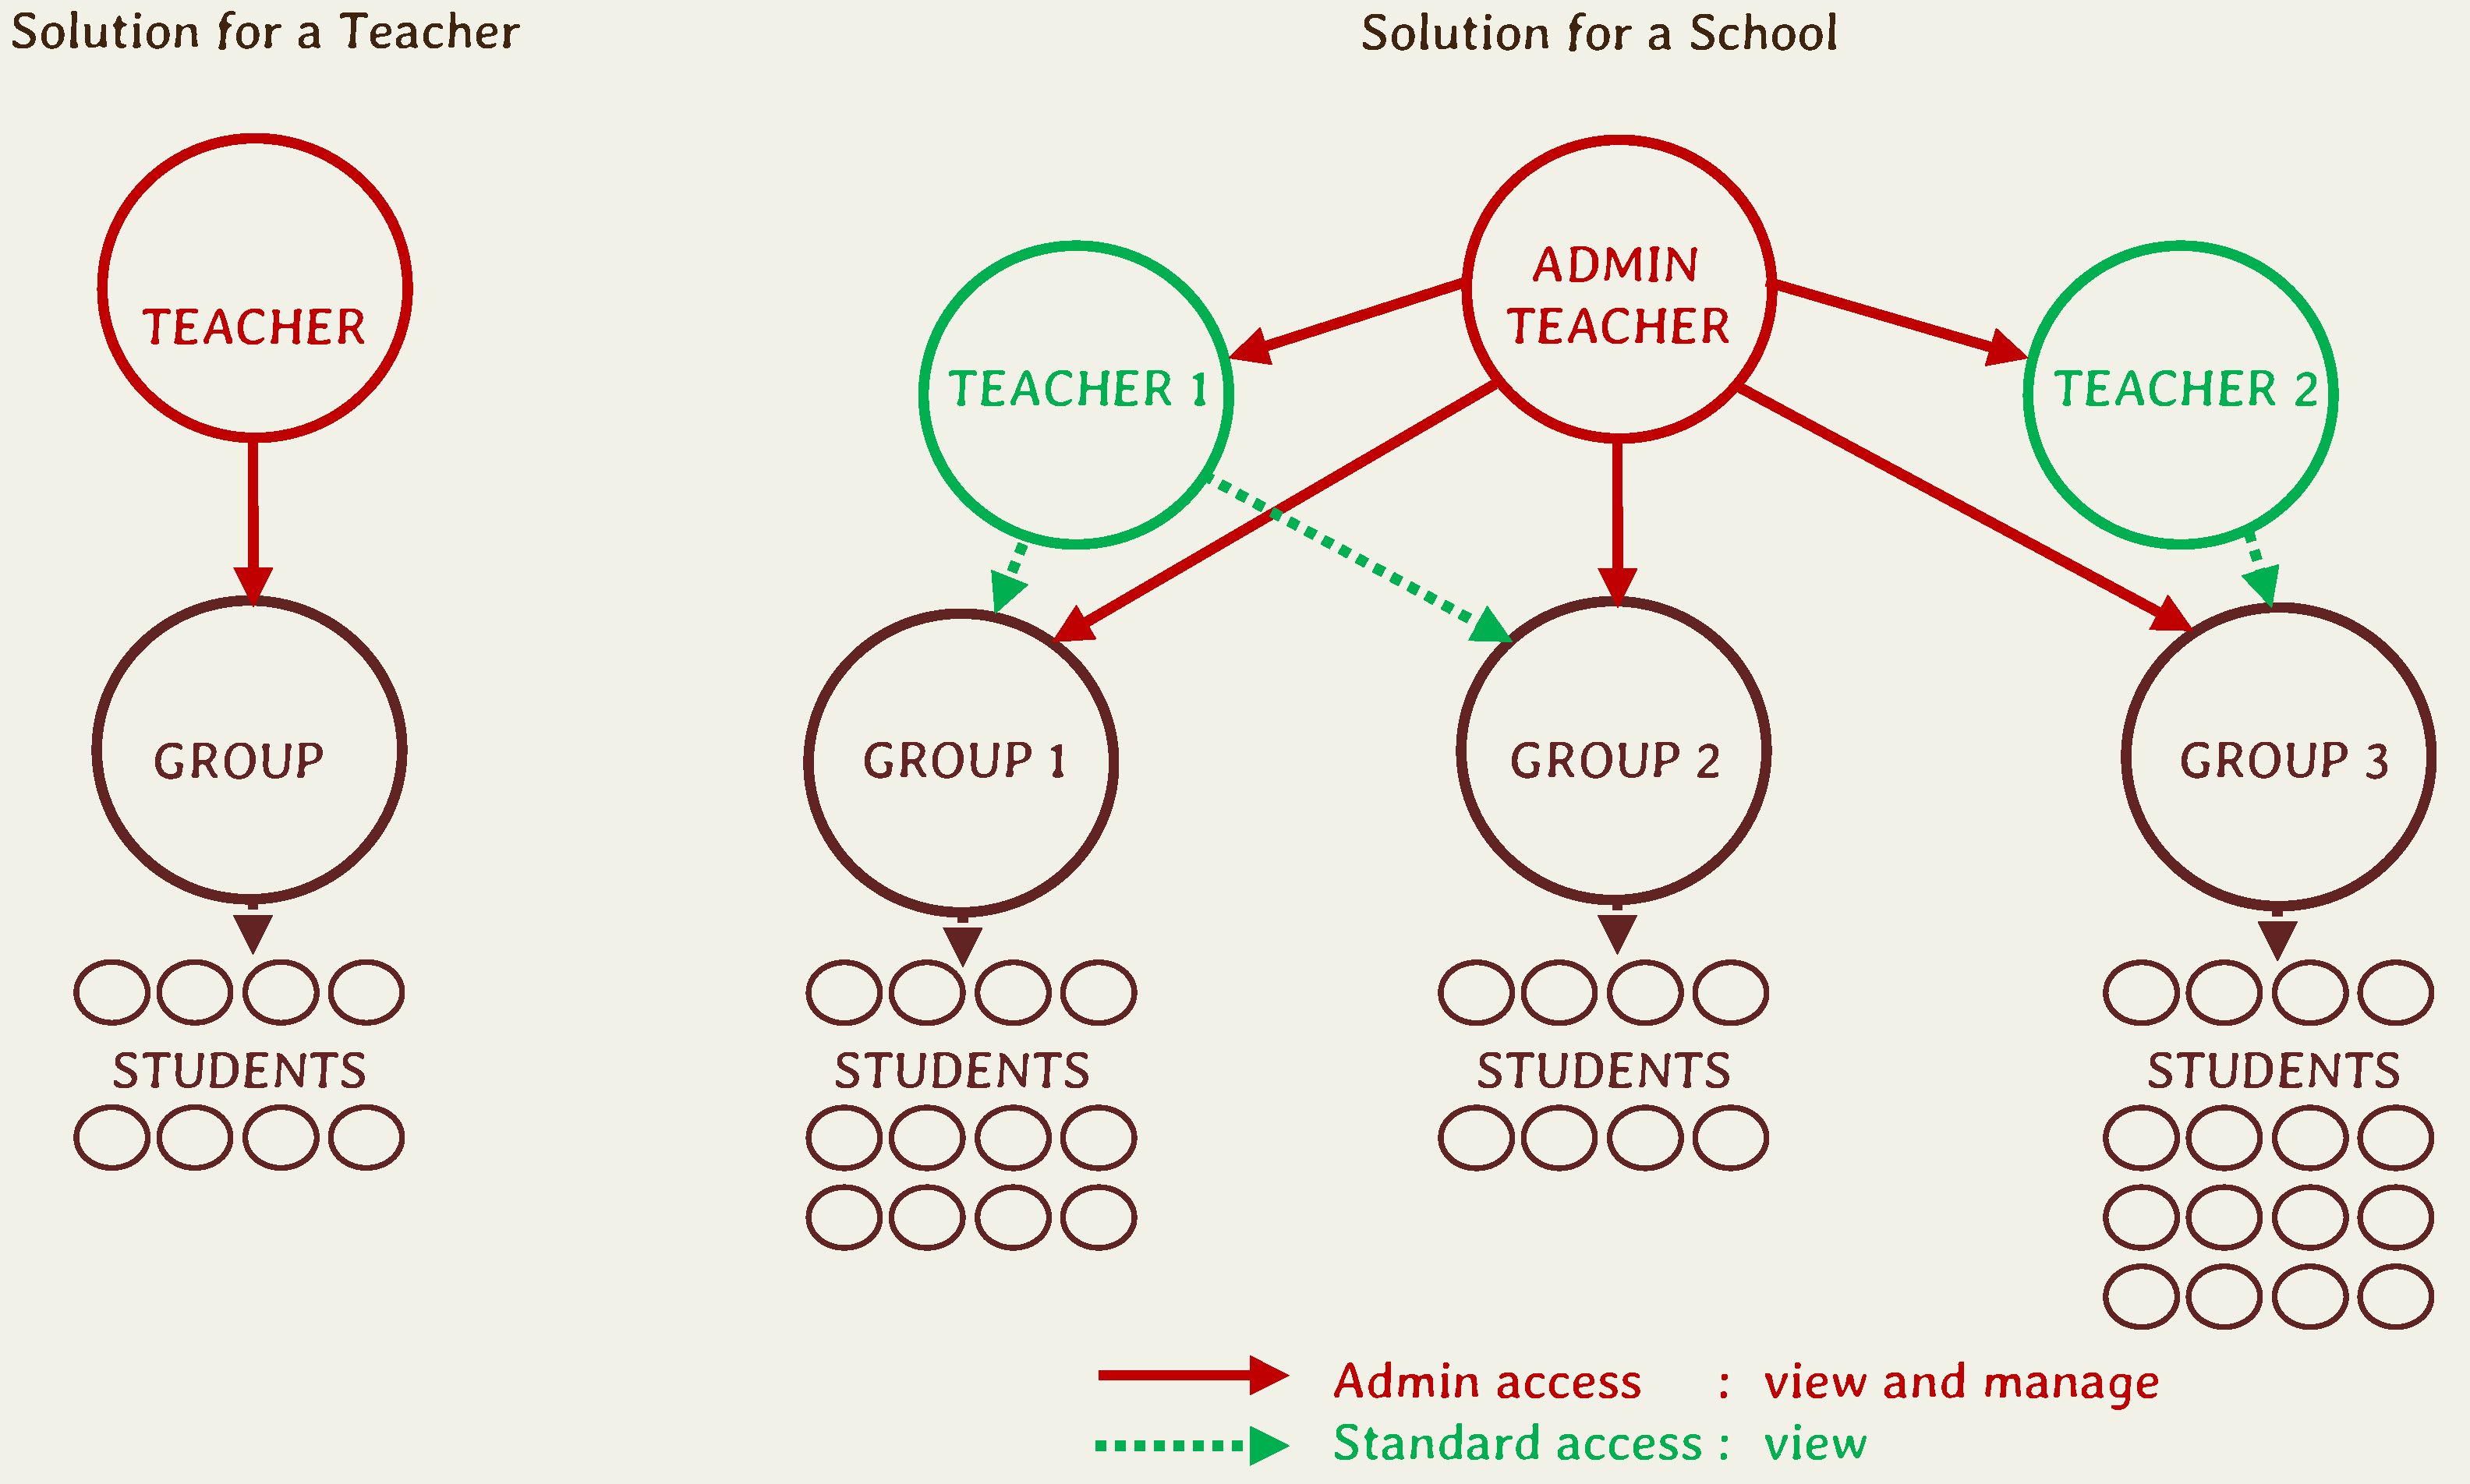
Teachers who own student licenses receive 'Admin rights'. They can add new groups, students (without the need for an email address or other personal identification) and teachers with standard access to the groups. Teachers assigned to a group with standard access can follow the progress of the students in their group, but cannot modify the data (e.g. delete student).
Learning Management (Student Overview)
Add Group / Modify Group Name / Delete Group / Change Group Expiry Date
Add a Student / Import Students
Modify Student / Delete Student / Extend License
Export this Table (Overview Table)
Teacher ID
At your very first access to the LMS (by clicking on Learning Management at the 'Hi, Nickname' dropdown menu after login) you must select a Unique Teacher Identifier. This ID will be the second part of your students' username, which students will use at login. Username example: JohnS@YOURID
Important: Student usernames are not e-mail addresses as we do not ask e-mail addresses from children as described in our privacy policy.
After you successfully submitted your Unique Teacher Identifier, the second step is to add groups with the Add Group function in the Group Management menu. Following that you can add students one-by-one to the groups or you can also import more students at the same time from a text or excel file in the Import Students function. Finally you can add other teachers to the groups. (If you are the only teacher in your groups then you do not need to add other teachers, as you receive access to all features with your admin access.)

Learning Management (Student Overview)
LMS can be accessed by logging in, then clicking on your name in the right upper corner (Hi, Nickname) and choosing the Learning Management menu item from the drop down menu.
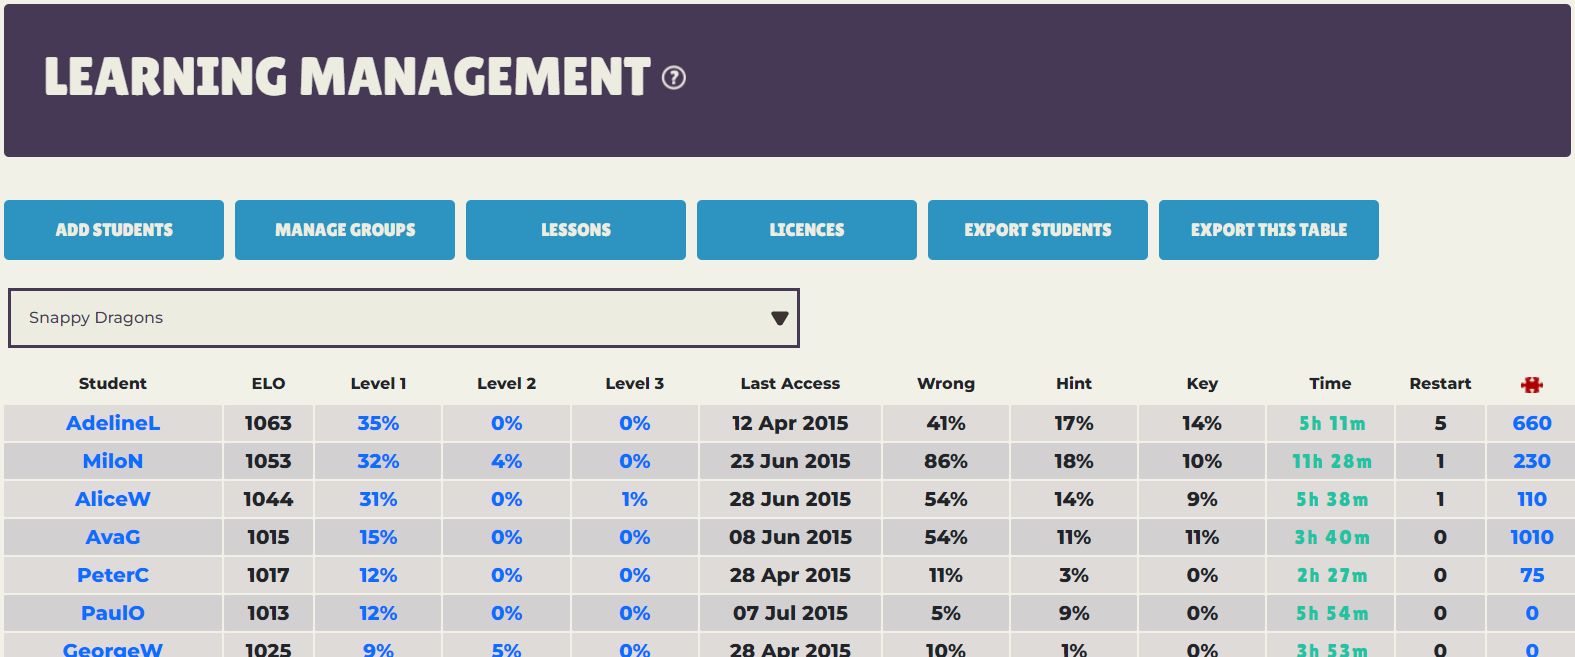
The Student Overview is the most important summary page about your students' progress. If you hover the cursor over the column names, you will see the description of each column.
If you click on a student's name you can modify your student's data.
You can sort this table by any category by clicking on the arrows on the header.

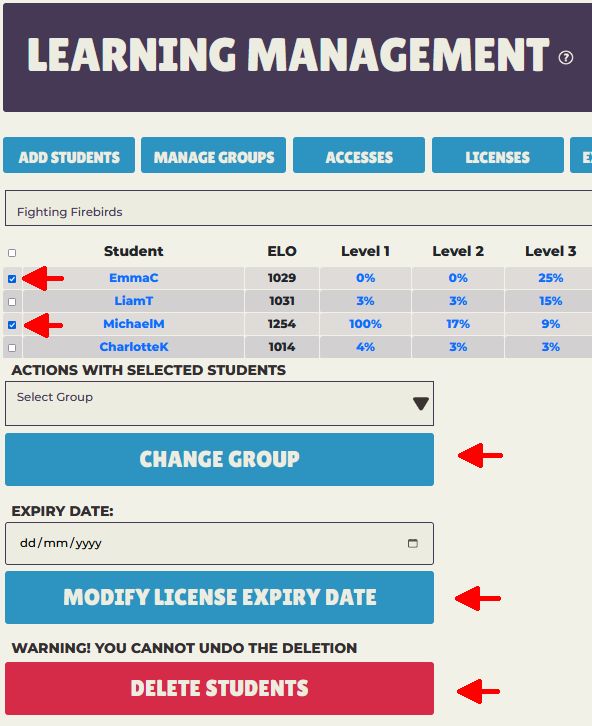
The coach can perform quick actions with the selected students, such as group change, expiry date modification, and student deletion.
Student Progress
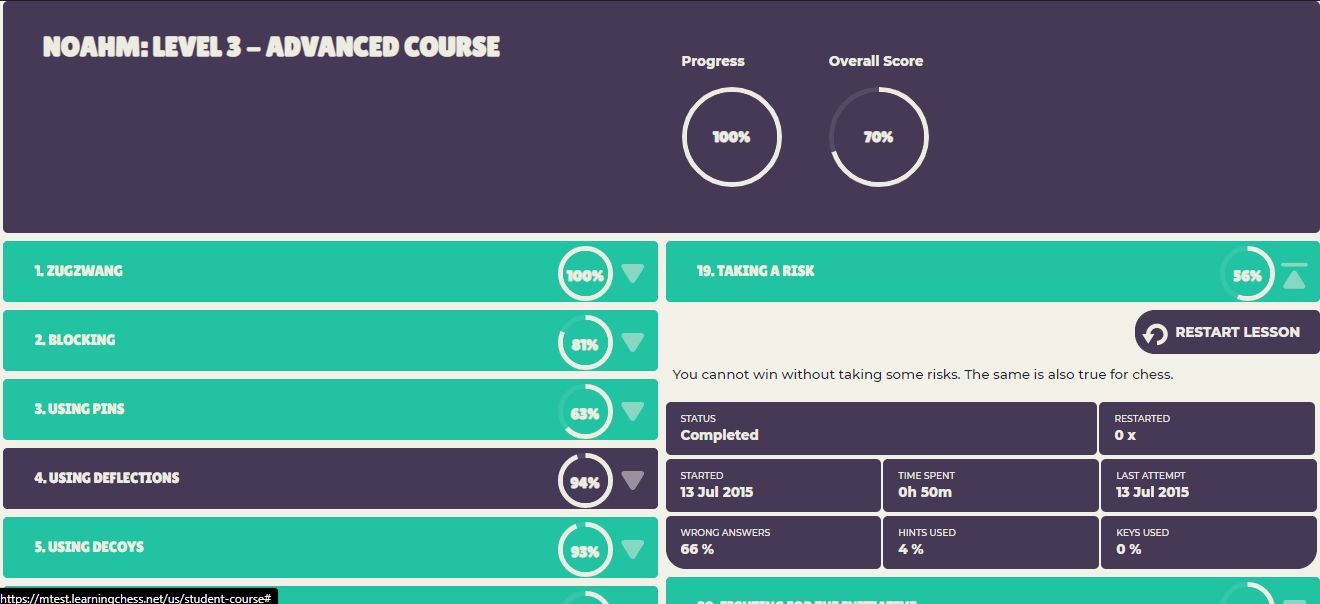
The percentage values in the first three columns (Level 1, Level 2, Level 3) show your student's progress in the given course. On the next screen you can see the progress lesson by lesson. By clicking on the down arrow at the end of the lesson title you can see the time used, the percentage of the wrong answers, hint usage and solution requests.
Puzzle Statistics & Badges
You can check the number of attempted puzzles in the overview screen under the jigsaw icon. By Clicking on this number you can check the progress, strengths and areas for improvement of your student.
The first table contains the puzzle solutions by difficulty levels. You can see the number of attempted puzzles in the first column, the number of correctly solved puzzles in the second one, and the solution ratio in the third one. We display each solution ratio where the success rate is above 80% (after 20 attempted puzzles) in green and mark the ones below 50% with red.

The second table contains the solutions by different tactics. As one puzzle can contain more tactic themes, the total number of tactics attempted is virtually larger in this table than in the previous one.

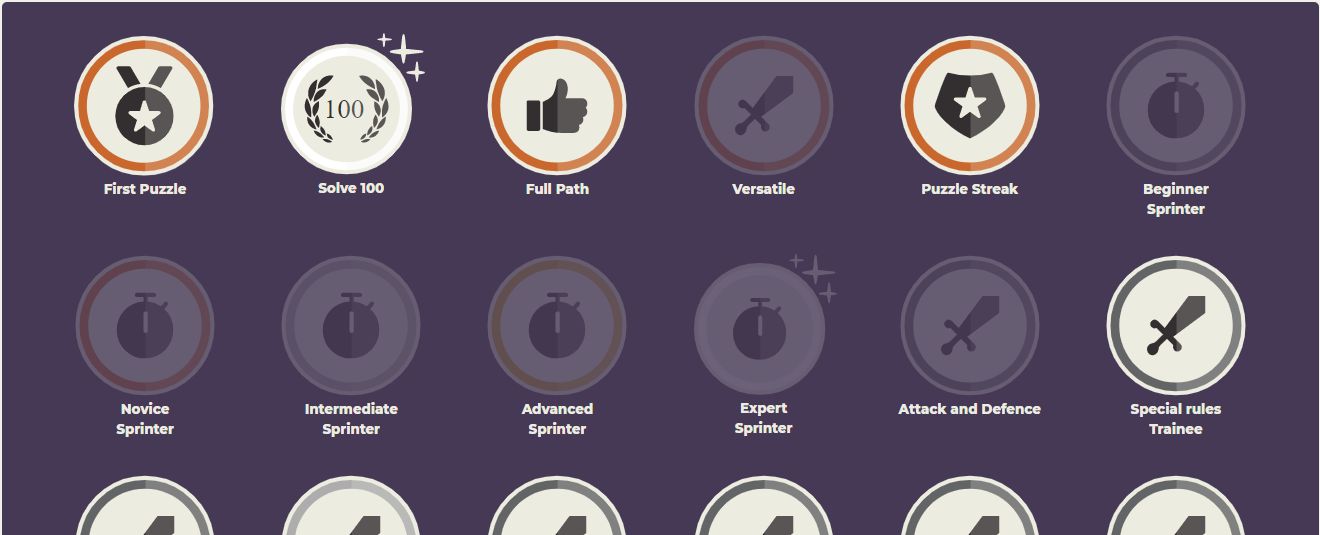
The currently acquired badges can be found below the statistics. This function is very useful at controlling puzzle contests, where the goal is gathering as many badges as possible within a given timeframe for example.
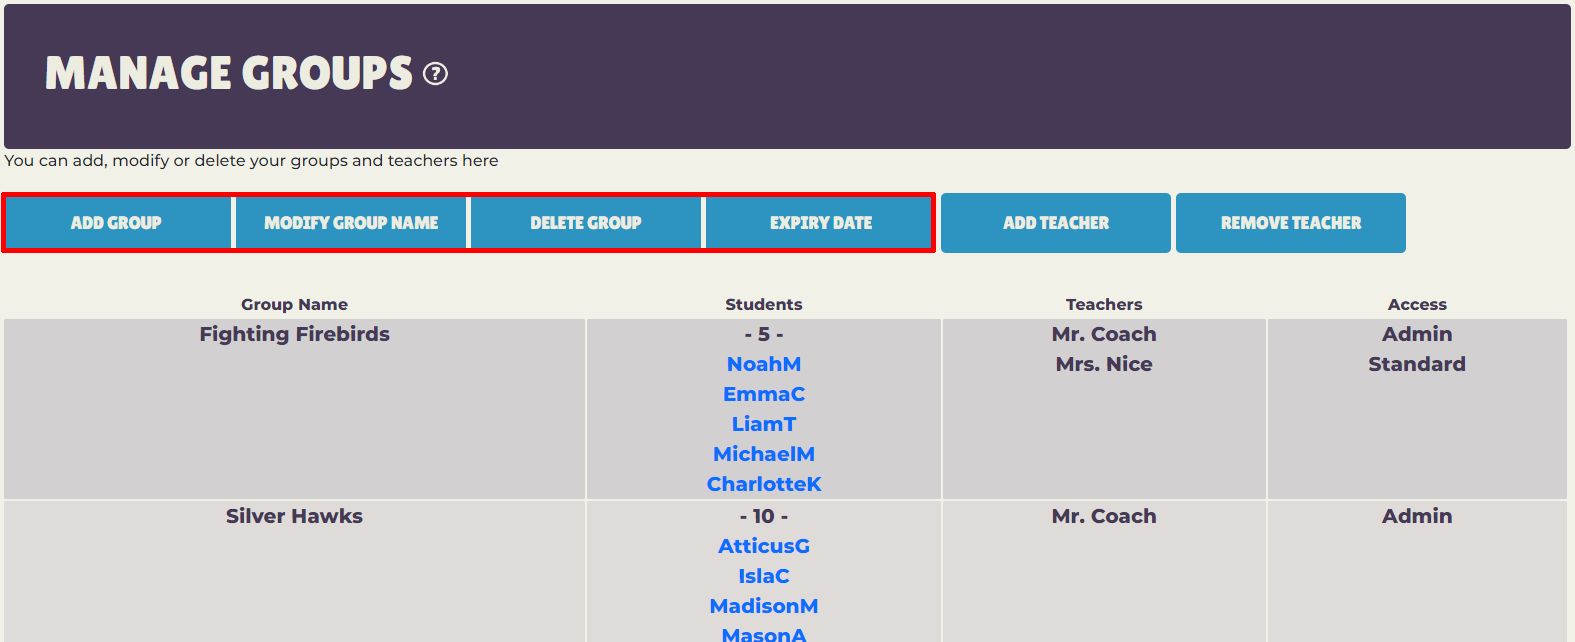
Add Group / Modify Group Name / Delete Group / Change Group Expiry Date
This function can be accessed in the Manage Group menu. In the LMS, students are assigned to groups. This is why you must add a group before adding any students. You can add a group by simply giving it a name. You can modify the group name anytime and delete the groups that do not contain any students. So, if you want to delete a group, please delete all students from it first. With the Expiry Date button, you can change the license expiry date for all students in a group.
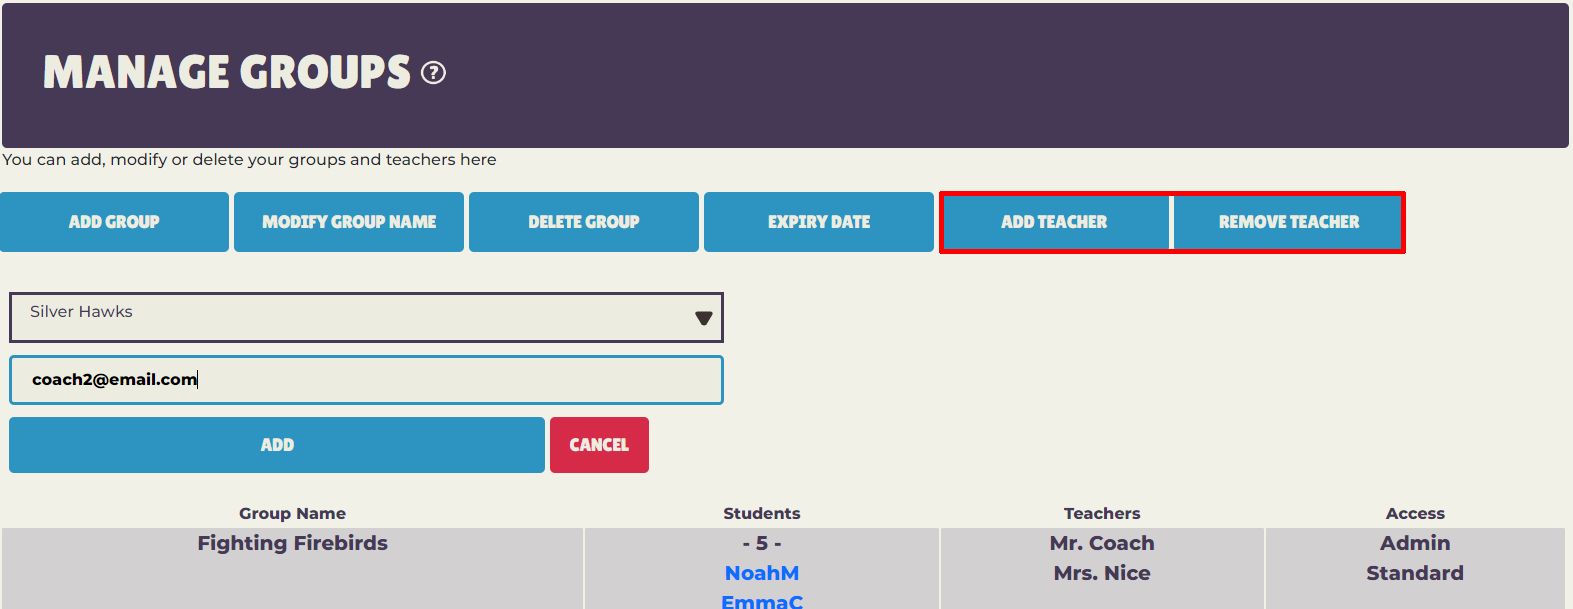
Add Teacher / Remove Teacher
This function can be accessed in the Manage Group menu. It is possible to add more than one teacher with Standard access to a group. Teachers with Standard access can look at the students' progress and solution data, but they cannot modify the data. You can add or remove a teacher anytime by providing an e-mail address.
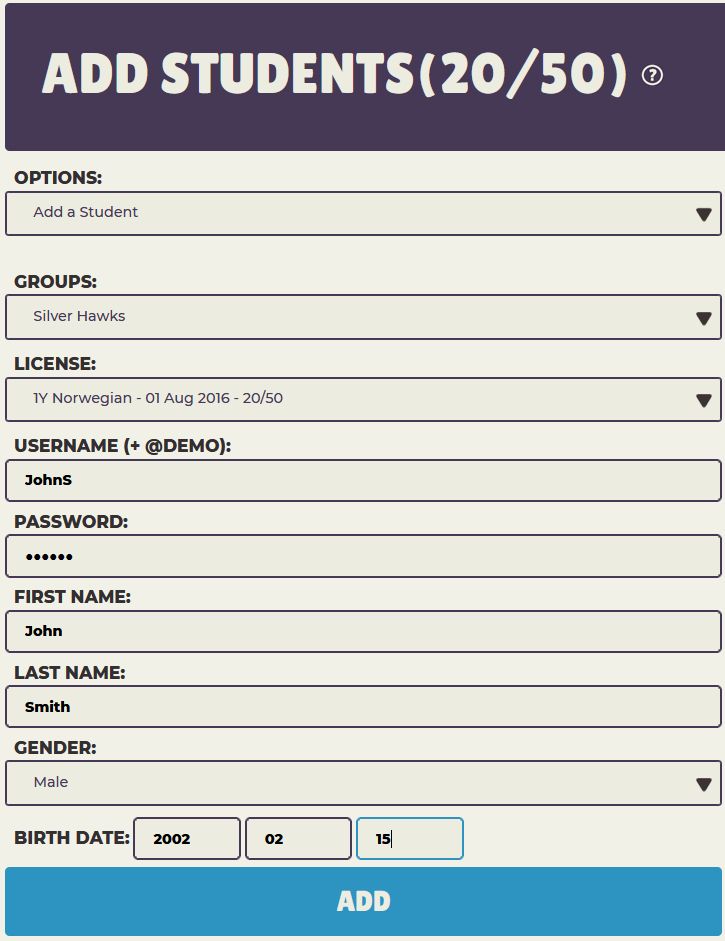
Add a Student / Import Students
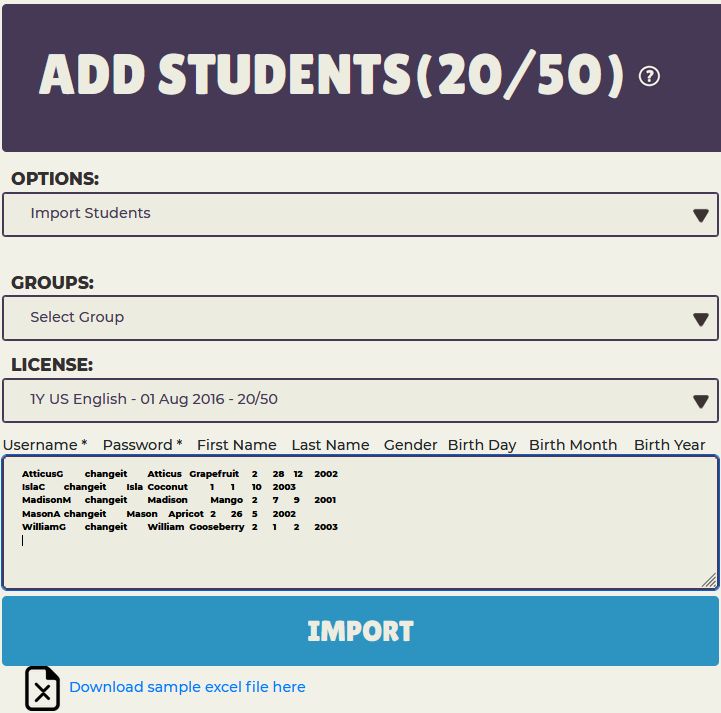
After adding groups and teachers to the LMS you can add students to the groups. This function can be accessed from the Overview page by clicking on the Add Students button. The login data of your student (username, password) will also be created here. Important: Your students' username will have the following structure: Name@YOURID YOURID was given at the very first use of LMS, so you do not have to add it again. We recommend that you combine the first name with the first letter of the last name (e.g. JohnS&YOURID) to create the first part of the user name, but there are no restrictions.
Add a Student: You can add students one-by-one with the Add a Student function. You have to select the group and license you would like to use then you have to create the username (@YOURID will already show on the screen) and the password. The first name, last name, gender and birth date are all optional.
Import Students: You can add more students at the same time with the Import Students function. You have to select the group and license you would like to use then you can copy paste the students' data into the window in the given order row-by-row. Please use Tab delimiter to separate columns. You can also copy from a text file containing Enters and Tab delimiters or from an excel file, too. Only the Username (without @YOURID) and the password is necessary, the first name, last name, gender and birth date are all optional. The gender can be set as Male or Female, or it can be left empty. Please import the birth date in three separate tabulated columns, in DD MM YYYY format.
Modify Student / Delete Student / Extend License
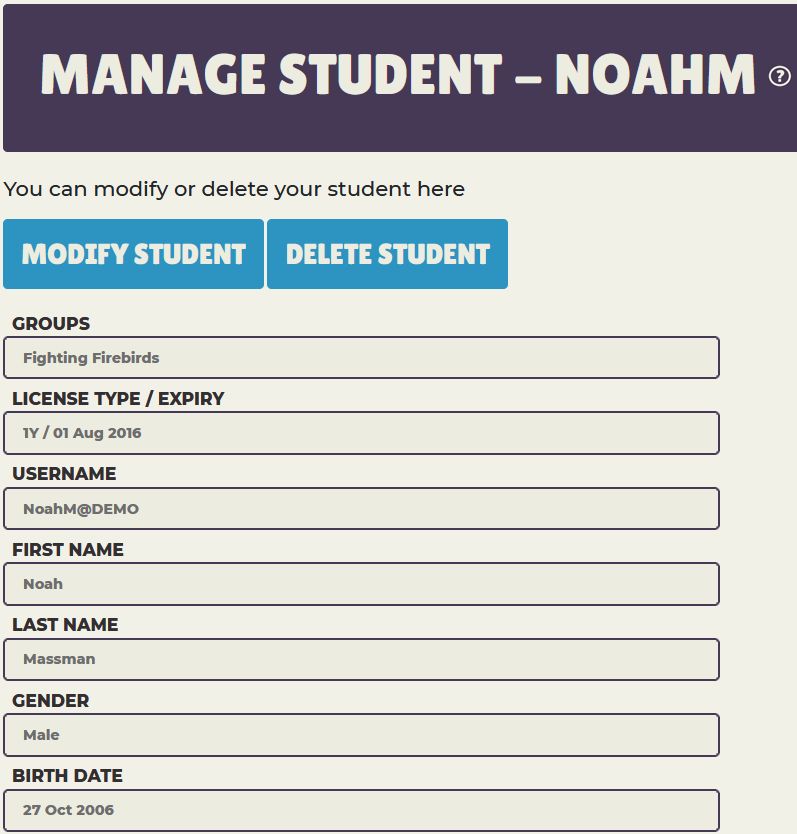
By clicking on a student's name in the first column you can access the above functions. You can modify all student data by clicking on the Modify Student button. You can also renew the student's password by using this function.
You can delete a student from the system by using the Delete Student function. After a successful deletion a license will be added to your available licenses. Deleting is only possible when the student did not start any lesson yet. You can delete a student later in the Delete Expired function too, however in this case the license won't be added.
You can Extend the student's access period to the system by using a new license. Please note that the license used to Extend the access has to have an expiry date that is latter than the current one. After extension the current active license will be lost.
Accesses
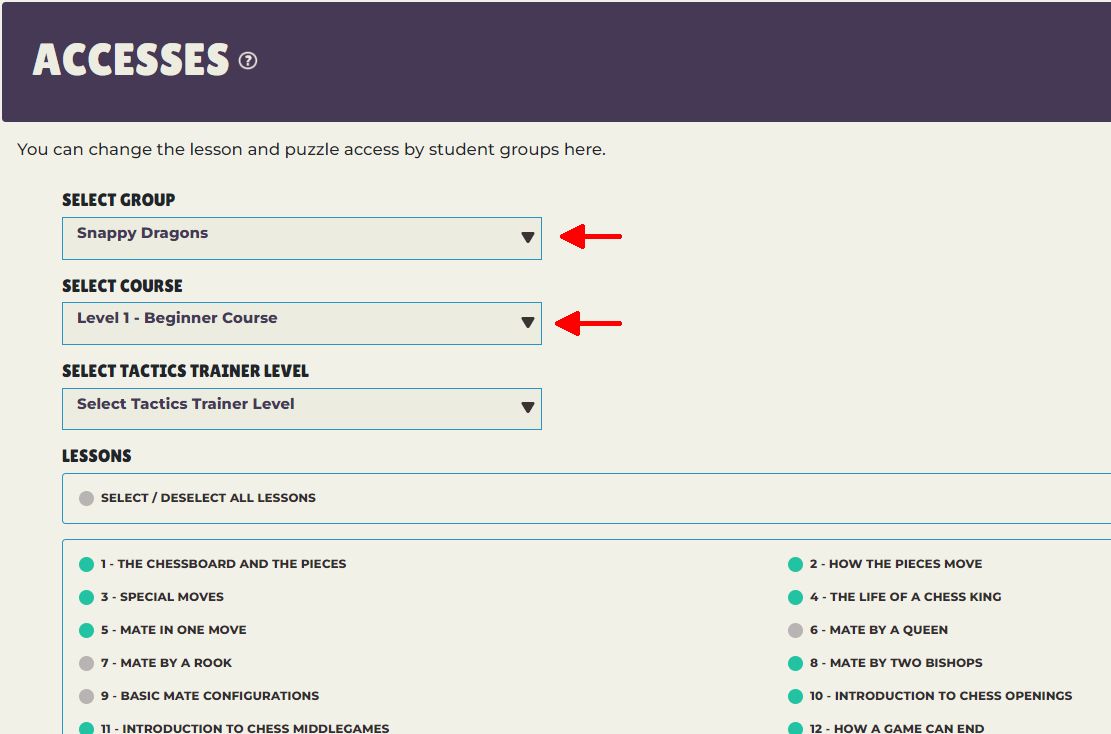
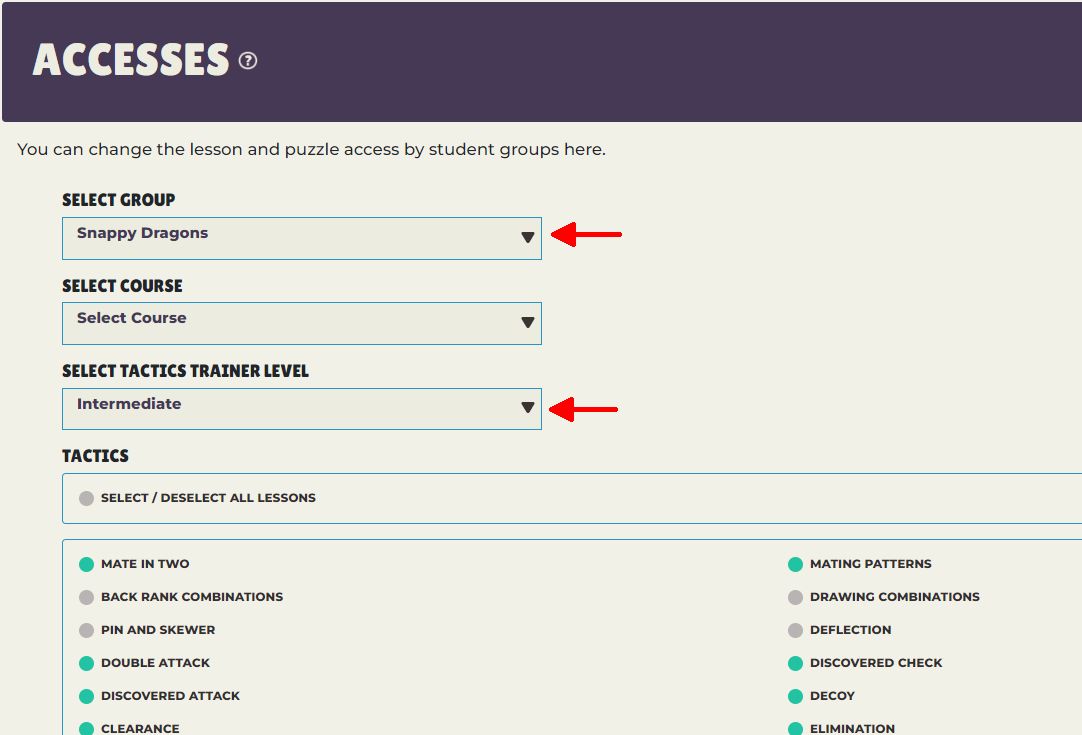
This function enables or restricts a student group's lesson and puzzle access. Start it from the Overview page by clicking on the Accesses button. Select the student group first, then the course or the Tactics Trainer level from the drop-down menus.
Lesson access
After choosing a course, you will see the lessons in it. You can select (green) or deselect (grey) them with the radio buttons before the lessons. You can also select/deselect all lessons with one button click.
Puzzle access
After choosing a Tactics Trainer level, you will see the tactics in it. You can select (green) or deselect (grey) them with the radio buttons before the lessons. You can also select/deselect all tactics with one button click.
Licenses
This function can be accessed from the Overview page by clicking on the Licenses button. You can see your license data in an informative table, such as how many available license you have, how many licenses you have used, etc.
Important: Licenses renew automatically, if there are unused licenses available at the expiry date.

Export Student Data
This function can be accessed from the overview page by clicking on the Export Students button. Your data will be exported to a tab delimited text file.
Export this Table (Overview Table)
This function can be accessed from the overview page by clicking on the Export this Table button. Your data which can be found on the current Learning Management overview will be exported to a tab delimited text file.

Renew Password
Students sometimes forget their password. The LMS has a built in automated function to speed up the password renewal process. Students have to click on the Forgotten Password link at the login window and they must provide their username in the designated field. By clicking on the Send button the system automatically sends an email to the teacher who can renew the password in the Manage student function.
